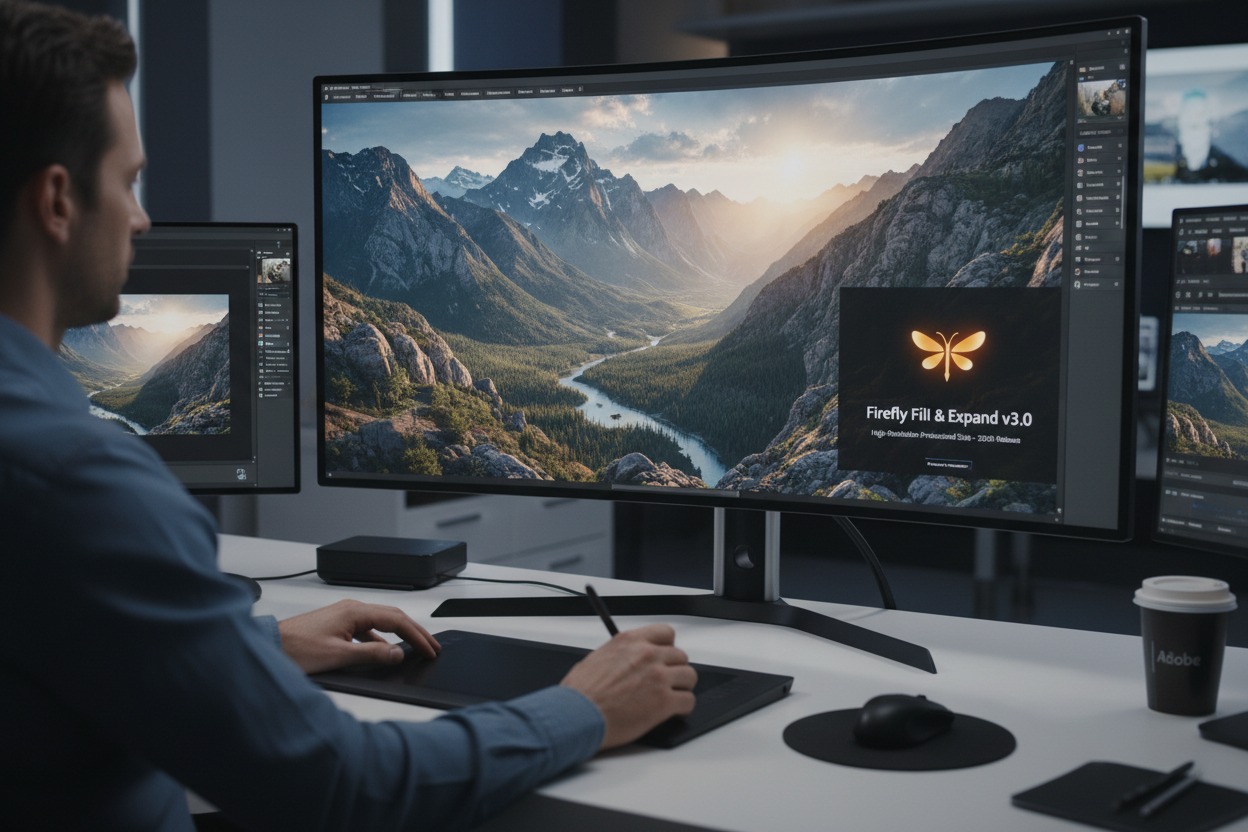
Adobe Firefly in Photoshop: How to Use “Generative Expand” to Fix Your Photos
In 2026, Generative Expand has evolved from a beta curiosity into a high-resolution professional tool. Powered by the latest Firefly Fill & Expand model (Jan 2026 update), it allows you to extend your canvas while maintaining a resolution of up to 2K (2048px) per generation—a significant jump from the previous 1K limit.
Whether you need to turn a vertical portrait into a horizontal cinematic shot or simply fix a “cramped” composition, here is the updated workflow for 2026.
Step-by-Step: Using Generative Expand in 2026
1. Select the Crop Tool
Select the Crop Tool (C) from the toolbar. Look at the Contextual Task Bar (which now floats near your cursor) or the top options bar.
2. Set “Fill” to Generative Expand
In the “Fill” dropdown menu, ensure Generative Expand is selected.
- Pro Tip: In the 2026 version, you can now choose your model. While Firefly Fill & Expand is the default, some users prefer the Nano Banana Pro partner model for complex organic textures like foliage or human skin.
3. Expand the Canvas
Drag the crop handles outward beyond the original borders of your photo.
- Aspect Ratio: Use the “Ratio” dropdown if you need to hit a specific size, like 16:9 for YouTube or 9:16 for TikTok.
- Symmetry: Hold Alt (Windows) or Option (Mac) while dragging to expand from the center.
4. (Optional) Enter a Prompt
If you leave the text box blank, Photoshop will use the “contextual pixels” to naturally continue your background. If you want something specific (e.g., “add a mountain range in the distance”), type it into the prompt box.
5. Generate and Review
Click Generate. Photoshop will provide three variations in the Properties Panel.
- Resolution Check: If the expansion looks slightly soft compared to your high-res original, hover over the variation and click the new “Enhance Detail” button. This uses AI upscaling to sharpen the generated area to match your camera’s native resolution.
New 2026 Features to Watch For
- Reference Image Support: You can now upload a “Reference Image” in the taskbar before clicking generate. This ensures the expanded area matches the lighting or style of another photo.
- Voice Commands: On Photoshop Mobile (and now Desktop), you can simply say, “Expand this to a cinematic 21:9 ratio and add more trees,” and the AI Assistant will execute the command.
- Adjustment Layer Integration: Generative Expand now automatically creates a Generative Layer. In the 2026 update, you can apply the new Clarity and Dehaze adjustment layers specifically to the generated area to help it blend perfectly with your original raw pixels.
Best Practices for “Fixing” Photos
- Avoid “Over-Expanding”: While the 2026 model supports 2K, expanding a tiny 500px photo into a 4K masterpiece still requires the Generative Upscale tool afterward for professional results.
- Use the “Remove Tool” First: If there are distractions near the edge of your photo, use the Remove Tool (which received a major speed update in March 2026) to clean them up before you expand. This prevents the AI from “repeating” those distractions in the new canvas.
- Check the Edges: Even with the “Fill & Expand” model, look closely at the seam where the original meets the new. If there’s a visible line, use the Selection Brush to select just that seam and run a blank Generative Fill to blend them.
Would you like me to walk you through how to use the new Generative Upscale feature to take these expanded photos to 4K or 8K resolution?